March 31, 2026
How to Prepare Architectural Files for a 3D Rendering Studio: The Ultimate Client Checklist
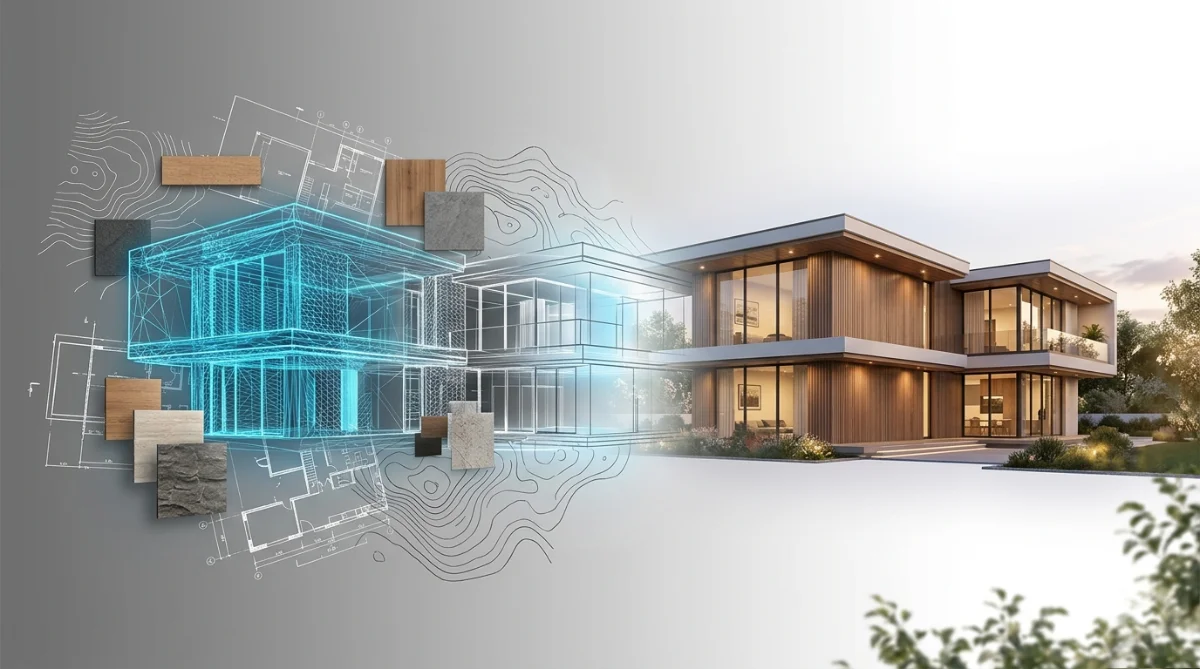
The difference between a project that takes three days and one that takes three weeks is often determined before the work even begins. The decisive factor is file preparation.
For architects and developers, handing off files to a visualization studio is a critical transition point. If the source files are clean, organized, and complete, the 3D artists can focus immediately on lighting and texturing. If the files are cluttered or missing data, the budget is consumed by "technical cleanup" rather than artistic refinement.
This guide serves as a definitive checklist for preparing your architectural assets for a professional rendering workflow, whether you use AutoCAD, Revit, SketchUp, or Rhino.
Phase 1: The Essential Data Package
Before exporting a single file, ensure your transmission package includes these three core components. A missing component here guarantees a "Request for Information" (RFI) email, delaying the start of your project.
1. The Geometry (3D Model or 2D Plans)
This is the skeleton of the project. We accept formats including .DWG, .RVT, .SKP, .MAX, .FBX, and .OBJ.
- Golden Rule: If you have a 3D model, send it. Even a rough volume study saves us time compared to building from 2D plans.
2. The Material Schedule (The "Look")
A grey model tells us nothing about the finish. We need a specification sheet or a "finishes plan" indicating:
- Facade Cladding: Specific stone, brick, or metal panel (e.g., "Alucobond Silver Metallic").
- Glazing: Glass reflection level, tint, and transparency.
- Flooring/Paving: Pattern direction and tile size.
3. The Context (The Site)
A building does not float in space. To create a photorealistic result, we need:
- Landscape Plan: Planting schedule or reference images for vegetation.
- Topography: DWG contour lines for sloping sites.
- Surroundings: Google Maps coordinates or site photos to match the background.
Phase 2: File-Specific Preparation Guidelines
Different software platforms require different cleaning protocols. Find your software below and follow the steps.
For AutoCAD (.dwg) Users
2D plans are the traditional standard. To ensure they are "render-ready":
- Clean the X-Refs: Bind all external references (X-Refs) into the main file. Broken links are the #1 cause of missing elevations.
- Remove the Noise: Delete hatching, text notes, dimensions, and hidden layers that are not relevant to the visualization. We need the lines, not the annotations.
- Unified Elevations: Ensure elevations align with floor plans. If a window is moved in the plan but not the elevation, the 3D artist will have to guess which one is correct.
For Revit (.rvt) Users
Revit models are powerful but often heavy.
- Purge Unused: Use the "Purge Unused" command to remove unused families and materials. This significantly reduces file size.
- Export in 3D Views: Create a specific 3D view named "Export_to_Viz". In this view, hide categories that we don't need (e.g., HVAC ducting, structural rebar inside walls, plumbing).
- Apply Generic Materials: You do not need to create perfect textures in Revit. Simply separate materials by ID (e.g., "Wall_Brick," "Wall_Plaster"). We will replace them with high-quality shaders in 3ds Max.
For SketchUp (.skp) Users
SketchUp is excellent for volume, but dangerous for geometry errors.

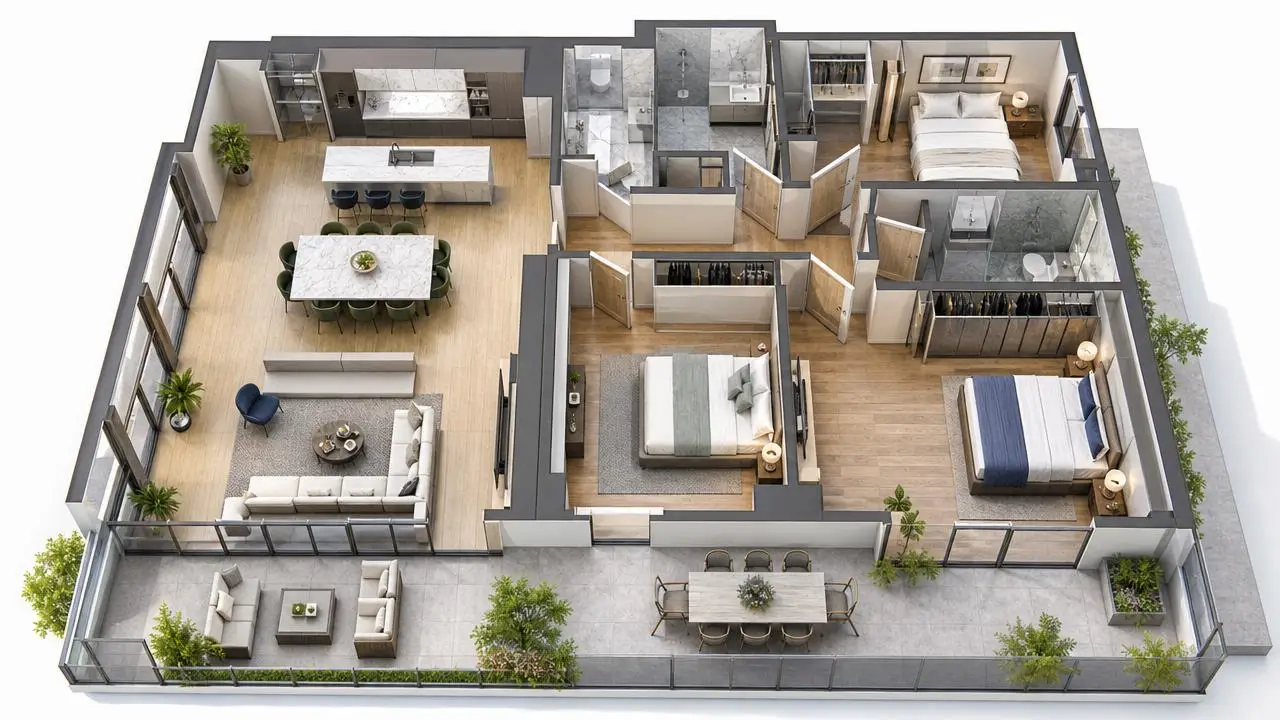
A detailed close-up of a 3D wireframe mesh. Cleaning complex geometry intersections, like the ones shown here, is crucial before exporting to a professional rendering suite.
- Fix Reversed Faces: Ensure all visible faces are white (front), not blue/grey (back). Reversed faces often render as invisible black holes in professional software like Corona or V-Ray.
- Group Geometry: Don't leave "loose geometry." Group walls, floors, and roofs separately.
- Explode Complex Components: If you used a dynamic component plug-in, explode it to basic mesh geometry before sending, as the plug-in might not exist on our end.
Phase 3: The Creative Brief (The "Soul")
Technical files provide the structure, but the brief provides the emotion. Without this, you will get a technically correct but boring image.
1. Camera Selection
Don't say "show the building."
- Mark the Views: Take a screenshot of your model or plan and draw arrows indicating the desired camera angles.
- Key Selling Points: Tell us what strictly must be visible (e.g., "The pool deck must be seen from the Master Bedroom").
- Tip: If you are unsure, request our "White Model Preview" service, where we propose cameras for you.
2. Lighting & Atmosphere
Describe the mood.
- Time of Day: Noon (bright/sharp), Sunset (warm/dramatic), or Dusk (cozy/inviting).
- Season: Summer greenery or winter snow?
- Reference: Attach 1-2 images from our Portfolio that match the vibe you want.
3. Styling & Entourage
Who lives here?
- Demographics: Young families, corporate professionals, or tourists?
- Activity Level: Busy street scene or quiet private sanctuary?
Common "Red Flags" to Avoid
To ensure your project stays on budget, avoid these common pitfalls:
- The "Final_Final_v3" File Name: Use a clear dating system (e.g., ProjectName_Model_2025-12-10.rvt).
- WeTransfer Expiry: Use a permanent cloud link (Dropbox/Google Drive) or ensure you re-upload if the link expires in 7 days.
- Missing Textures: If you use custom textures in your model, use the "Pack and Go" or "Archive" feature to include the image files (JPG/PNG) along with the model.
Checklist Summary: Ready to Send?
Before hitting "Send" on your inquiry to Ravelin3D, scan this final list:
- Clean Geometry: 2D Plans or 3D Model (cleaned and purged).
- Material Specs: PDF or Mood Board indicating finishes.
- Camera Angles: Marked on a plan or screenshot.
- Context Data: Site address or landscape plan.
- Brief: Desired lighting, mood, and resolution.
By following this protocol, you ensure that 100% of your budget goes toward making the image look beautiful, rather than fixing technical errors.
Need a professional team to handle your files?
We work with everything from hand sketches to complex BIM models.
Start your project with Ravelin3D today.

'%3e%3cpath%20d='M23.3971%207.52388C22.0124%2010.1548%2018.9371%2014.2051%2016.3629%2016.8761C13.3954%2020.0856%206.39983%2024.4744%206.39983%2024.4744C5.85983%2024.7578%204.36066%2024.7794%203.94857%2024.3677L2.45719%2022.8802C2.14928%2022.3657%202.01074%2021.769%202.45719%2021.3931L5.44101%2019.1608C5.94593%2018.8196%206.5203%2018.7505%206.93239%2019.1612L8.77101%2020.9938C9.20365%2020.6901%2016.1096%2016.1642%2019.9512%209.93333L18.0687%208.05537C17.6566%207.6447%2017.7267%207.07175%2018.0687%206.56754L20.3066%203.59258C20.7187%203.04266%2021.3866%203.1812%2021.798%203.59258L23.2904%205.0797C23.8751%205.62856%2023.7057%206.90876%2023.3971%207.52388ZM24.5685%204.01742L22.2239%201.6799C21.5772%201.0336%2020.527%201.03396%2019.8796%201.6799L16.3633%206.35565C15.8261%207.14616%2015.7163%208.04758%2016.3629%208.69352L17.7983%2010.1247C16.7342%2011.5498%2015.4572%2013.1046%2014.0194%2014.5382C12.3937%2016.1589%2010.5852%2017.6329%208.95916%2018.8433L7.57196%2017.4611C6.9253%2016.8148%206.02176%2016.9239%205.2277%2017.4611L0.538854%2020.9675C-0.247056%2021.5093%20-0.108866%2022.6595%200.538854%2023.3058L2.8831%2025.6426C4.17853%2026.9345%205.86231%2026.521%207.57196%2025.6426C7.57196%2025.6426%2012.747%2022.7459%2017.1775%2018.3278C21.3451%2014.1715%2024.5685%208.69352%2024.5685%208.69352C25.2403%206.84994%2025.8636%205.30896%2024.5685%204.01742Z'%20fill='%23FFAA00'/%3e%3c/g%3e%3cdefs%3e%3cclipPath%20id='clip0_2729_2176'%3e%3crect%20width='26'%20height='26'%20fill='white'%20transform='translate(0%200.463867)'/%3e%3c/clipPath%3e%3c/defs%3e%3c/svg%3e) +1 (646) 693 0048
+1 (646) 693 0048
 main@ravelin3d.com